¶ Bot settings in Telegram
Bot description, appearance settings, and Mini App configuration
¶ What is BotFather
Every Telegram bot has a unique name and is created via the official @BotFather bot. Through BotFather you manage your bot's appearance: avatar, description, and Mini App settings. Managing bots became much easier once BotFather got a convenient Mini App interface. Creating your own bot is free and takes just a couple of minutes — all you need is to pick an available unique username. We recommend creating a bot as soon as possible to claim your brand name on Telegram.
A video guide is available on Youtube. A step-by-step guide follows below.
¶ How to create your own bot?
Creating your own Telegram bot only takes a couple of minutes.
Open @BotFather. In the chat, tap the Open button at the bottom left to launch the Mini App. The Mini App shows the list of bots you have created previously.
1. Tap the Create a New Bot button
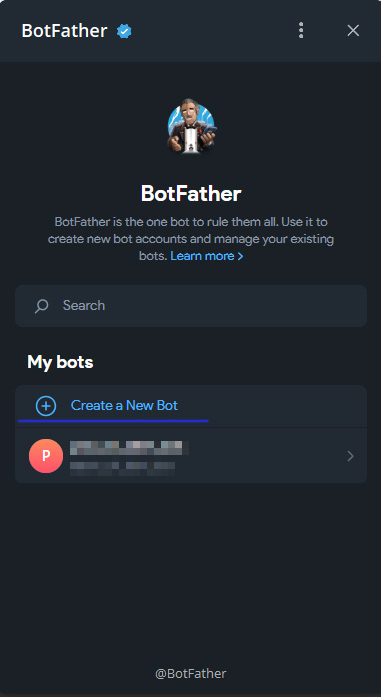
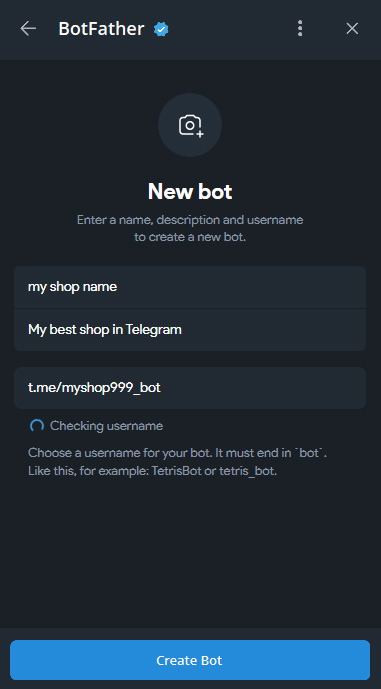
2. Choose a name for your new bot. The name and description are displayed in the bot's Telegram contact card, so we recommend using keywords to rank higher in search. Any letters and symbols are allowed.
The bot's username must use Latin characters only and must end with _bot. For example, myshop_bot.
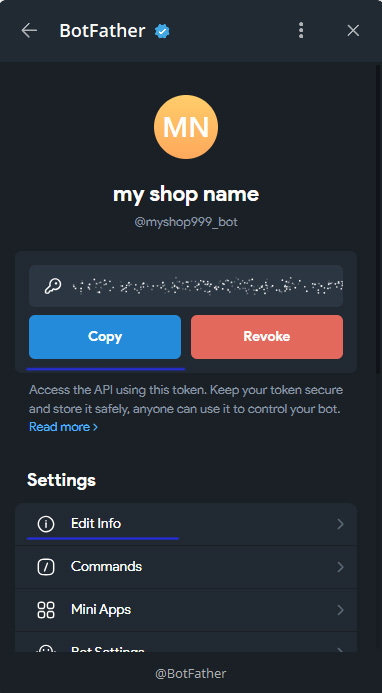
3. Congratulations, your bot is created! Copy the token and paste it into your Appexbots admin panel to link the bot.
That completes the essential steps.
¶ Additional settings
You can additionally polish your bot's Telegram contact card. These settings can be changed later.
Select the bot and tap Edit info. Here you can change the bot's display name without changing its username @myshop_bot. We recommend setting a full name and description so customers can easily find your bot in Telegram search.
Below you can set an intro picture and a Welcome message. Image resolution is 640x360; for GIFs — 320x180 / 640x360 / 960x540.
¶ How to create a Telegram shop for your bot
The shop creation process is highly automated.
If you don't have a bot yet, see above how to claim a bot name for free. If you already have a bot, copy its token and open the Appexbots registration bot @appexbots_bot
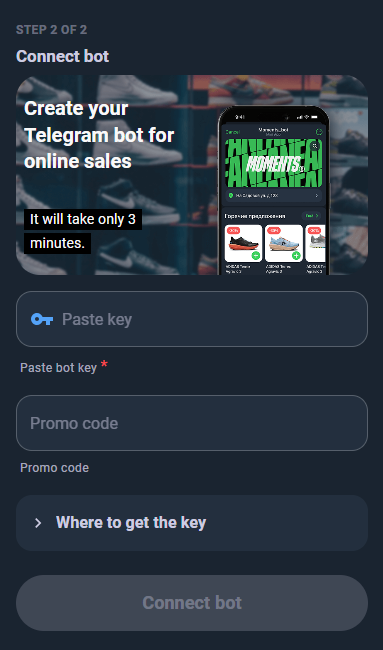
- Choose the bot type: Online restaurant, Online shop, Support chat (Reply Bot), or Request (Lead gen bot)
- Paste your bot's token
- Your shop is created.
¶ How to set up your shop
For the shop appearance settings, see the Shop settings section.
To learn how to add categories and products, see the Products page.
Your shop is ready to take orders today!